[
 ](https://lh3.googleusercontent.com/-mM3kZfcLGjI/V-vvvtfCPyI/AAAAAAAABjs/OoKXrHcDb7I/s1600/logo.jpg)
Watching the same boot animation all the time is sometimes boring. It would be great if we could set our own customised theme for our device. In this tutorial I’m going to walk you through how to change Android boot animation easily. Let begin!
Before getting started there’s a small notice.
Modifying some device elements could potentially harm your device. So we must be careful while navigating through the system files. Be brave ;)
So, we can move forward with the procedure.
Prerequisites.
*)Rooted device
*)Root browse / Es file
*)Boot animation.zip
*)Desired image to replace the boot image.
After completing the prerequisite, Follow further steps.
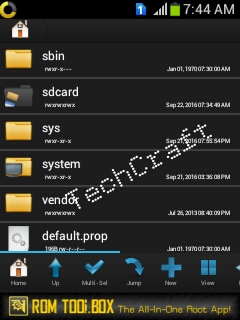
First of all open the file browser and allow root permission. If you are using.‘ES file’, choose ‘Root Explorer ’ option from the left side panel to allow su permission.
Now open the root directory. Once you are in the root directory,you would notice the
/System folder. Get into it .
The boot animation and media based stuffs are located in /system/media/
/SYSTEM /MEDIA
Here you will see a file called ‘bootanimation.zip’. This is your boot animation file.
Now its your chance to replace the file. Download the appropriate bootanimation for your screen resolution and replace the
existing file.
Or if you wish to develop a custom boot animation, it is also possible. I’m here going through a quick tutorial on how to do it as well.
The first step is about to draw the animation. This can be created by a collection of images which form one complete animation.
So basically ,there are frames associated with this. This frames must be arranged in the increasing order of numbers.
Wait…I’ll make it bit more simple !
Example:
These files should be arranged in the increasing order like , 0.png,1.png,2.png and so on.
If you extract a ‘bootanimation.zip’ file;you will able to see some folders named as
‘Part1’ , ‘‘Part2’ like this.
So here we have to put Each part of the animation into a separate folder, like ‘part1’ and ‘part2’.
Finally open Notepad and write out a few lines of instructions. The first line should be the resolution and frame rate of the animation. The resolution must match that of your device. The frame rate should match the one in the original desc.txt.
Each part folder requires one line of instruction. Write out the numbers for each part of the animation. Once finished, save the file as desc.txt.
The final thing is about to create the zip file. Select all the part folders along with desc.txt.
Now you can go ahead and create the zip. Whatever it maybe,but the zip name should be ‘bootanimation.zip’ itself.And then the final step is to replace the existing bootanimation with the new created one.And congratulations! You have successfully developed your own custom bootanimation.
Making custom bootanimations are really easy now without any effort.
DOWNLOAD BELOW!!
https://play.google.com/store/apps/details?id=com.jrummy.apps.boot.animations


